Continuing with the theme I have going about reports and presentations, and how to do things within Office products, I thought I’d write a guide on how to change the orientation of a single page in Word to landscape.
It’s something I’ve seen done, and it’s always stuck out as something I’ve wanted to try, but not yet had the need to. It’s not the most logical process, however I hope that the steps below will help you when you need it most.
Steps to Make Page Landscape
Step 1
Open the Word document and ensure your cursor is at the end of the page before you want to make your landscape page. For example, if page 3 needs to be landscape, click after the last word on page 2.
Step 2
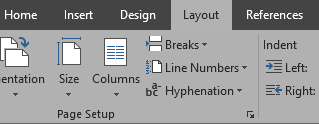
Click on Layout in the menu ribbon, and click on Breaks
 Step 3
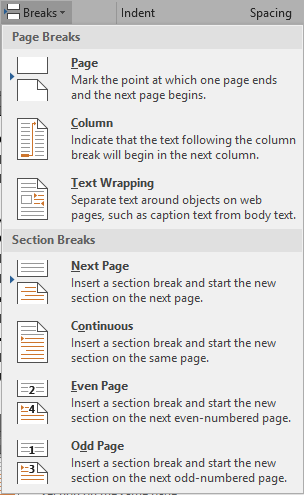
From the Breaks drop down menu, choose Next Page situated under Section Breaks
 Step 4
It will look like a blank line was entered, unless you have paragraph markings showing. To turn paragraph markings on or off, click on Home in the menu ribbon, and then on the backwards looking P, which is the Show/Hide Paragraph Marks button
 Step 5
There’s a couple of ways you can do this next part. The first is on a completed document, the other is to do this while writing.
If you’ve already finished the document, now scroll to the end of the landscape section, and click your cursor after the last word. Repeat steps 2 and 3 to enter another break, and then move on to step 6.
If you’re doing this while typing, follow step 6 now.
Step 6
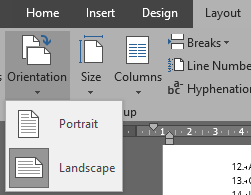
Ensure your cursor is within the section to be made landscape, and click on Layout in the menu ribbon. Open the drop down for Orientation, and choose Landscape
 The page or pages between the two section breaks will now be in landscape as shown below.
 If you’re typing the document and changing orientation as you go, follow steps 2 and 3 once you’ve finished typing your landscape section, and then open the Orientation menu and change back to Portrait, then continue writing.
And you’re all done! If you need any assistance, please send us a message!


