Have you ever received a contact list with all the names listed in full, and you’ve needed to separate them into different cells? I know I have, so I had to find a way to split them without doing it manually.
What I’ve found is that Excel is great. The functions can do just about everything – including splitting first and last name into individual cells! There is a method built into Excel to do this as well, which I’ll also show you. It’s helpful for larger amounts of data where the function can get complicated and messy.
Using the Function
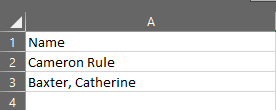
The function works for these two types of lists; firstname lastname and lastname, firstname.
The process is the same, though the function varies slightly. So if this is the list you’ve got, you’ll want to enter the formula to the right, or insert some columns if there is more information.
To get started, the function you’ll need is: =LEFT(XX, SEARCH(” “, XX)- 1) where XX is the cell that has the full name in it as firstname lastname. If it’s like my second column, lastname, firstname, change the ” ” to “,” (see example below).
This is what the function is doing; LEFT is starting at the left and grabbing any string of numbers or letters, and SEARCH is then finding the space (” “) and ending the string. The -1 is the deleting the space, leaving you with just the first name. You’ll have your list looking like the below.
To get the next name, you’ll need to start from the right, and this is the formula: =RIGHT(XX,LEN(XX) -SEARCH(” “,XX))
This function is doing something slightly different; Starting from the RIGHT, it’s finding the whole length (LEN) of the string, then doing a SEARCH for the position of the space, and then subtracting that position from the total length. Once you input this into the next column, or in my case column C, your list will look like this;
 You can easily drag the formula down the entire list and separate your list in no time!
Excel Text to Columns
When you have more than 2 pieces of text that you want to separate into columns, the above formulas are not practical. Instead, Excel has a “Text to Columns” feature than we can use.
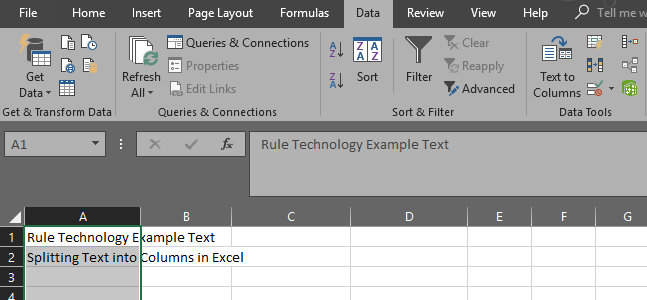
First, highlight the records you need to separate, then click on Data and Text to Column. In my example below, I have the first row with 4 words, and the second with 6 words.
 Once you click on Text to Columns under data tools (to the right of the above screenshot), a 3 step dialogue box will appear. In our case, we want to choose Delimited for step 1 since there is a space between each word;
 In step 2, you choose what separates your text. You can choose from Tab, Semicolon, Comma, Space, or choose Other and key in your own;
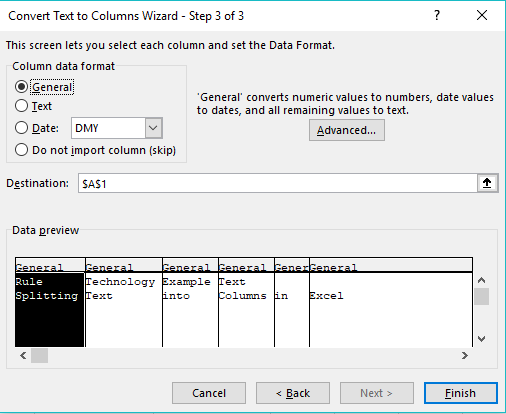
 In the final step, you choose the data type for the columns. For example, if you’re splitting data that has a date in it, you can set the column that contains the date to Date, and select the format you’d like;
 Once you click on finish, your data will appear in columns, so for me, I have row one in four columns, and row two in six. This feature has the potential to make your life a lot easier.
 If you’re having any issues with this, please Contact Us and we’ll be happy to help out!


